Sai Flexisign Pro V1001 Build 1577 12 2020 Info
Sai FlexiSign Pro v10.0.1 Build 1577 offers several advanced features:
: Automatically generates border cut lines around graphics to make removing excess vinyl fast and easy.
The number isn't random. To the marketing team, it's just "version 10.01." But Rina knows the truth. 1001 is binary for 9. The ninth version reborn. 1577? That’s the Unix timestamp of the moment her mentor, Old Man Kessler, first compiled the core RIP engine—twenty-three years ago, to the second. sai flexisign pro v1001 build 1577 12 2020
Advanced tools for contour cutting, weeding lines, and tiling large jobs.
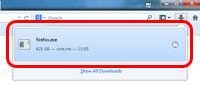
: Files modified to bypass licensing security frequently harbor hidden ransomware or spyware that can compromise an entire business network. Sai FlexiSign Pro v10
FlexiSign Pro excels at contour cutting. Using interactive alignment marks, the software syncs wide-format inkjet prints with optical-eye vinyl cutters. Build 1577 handles multi-pass printing and cutting smoothly, preventing alignment drift over long graphics sheets. 4. Direct Drivers for Legacy Hardware
: Full-featured vector drawing tools optimized for geometric design and text manipulation. 1001 is binary for 9
Acting as the central RIP (Raster Image Processor) workstation, this module handles file processing. It takes complex vector graphics, transparencies, and gradients, translating them into ultra-precise dot patterns for printers and continuous lines for cutters. Build 1577 allows a single Production Manager instance to actively queue, process, and drive up to five distinct output devices simultaneously. 3. True-Shape Nesting Engine
The "12-2020" is the problem.
The Sai FlexiSign Pro v10.0.1 Build 1577 user interface is divided into several sections:
You mentioned an "interesting paper" related to Sai Flexisign Pro v10.0.1 Build 1577 (12/2020). Could you provide more context or information about the paper you're referring to? I'd be happy to help you explore it further.
Sai FlexiSign Pro v10.0.1 Build 1577 offers several advanced features:
: Automatically generates border cut lines around graphics to make removing excess vinyl fast and easy.
The number isn't random. To the marketing team, it's just "version 10.01." But Rina knows the truth. 1001 is binary for 9. The ninth version reborn. 1577? That’s the Unix timestamp of the moment her mentor, Old Man Kessler, first compiled the core RIP engine—twenty-three years ago, to the second.
Advanced tools for contour cutting, weeding lines, and tiling large jobs.
: Files modified to bypass licensing security frequently harbor hidden ransomware or spyware that can compromise an entire business network.
FlexiSign Pro excels at contour cutting. Using interactive alignment marks, the software syncs wide-format inkjet prints with optical-eye vinyl cutters. Build 1577 handles multi-pass printing and cutting smoothly, preventing alignment drift over long graphics sheets. 4. Direct Drivers for Legacy Hardware
: Full-featured vector drawing tools optimized for geometric design and text manipulation.
Acting as the central RIP (Raster Image Processor) workstation, this module handles file processing. It takes complex vector graphics, transparencies, and gradients, translating them into ultra-precise dot patterns for printers and continuous lines for cutters. Build 1577 allows a single Production Manager instance to actively queue, process, and drive up to five distinct output devices simultaneously. 3. True-Shape Nesting Engine
The "12-2020" is the problem.
The Sai FlexiSign Pro v10.0.1 Build 1577 user interface is divided into several sections:
You mentioned an "interesting paper" related to Sai Flexisign Pro v10.0.1 Build 1577 (12/2020). Could you provide more context or information about the paper you're referring to? I'd be happy to help you explore it further.